4 Rustic, Romantic Christmas Ornaments to Craft in Minutes
Make these deceptively easy paper ornaments with the kids or savor some solo crafting time

Christmas for me is about coming together to celebrate love and life. Cozy gatherings in softly lit, romantically decorated rooms immediately spring to mind. For this ideabook, I wanted to offer ways to create a romantic Christmas setting with a tree decorated with handmade fabric and paper ornaments. Amidst the hustle and bustle of the holidays, I hope you are able to find a few quiet moments to make these simple and pretty ornaments.
To create all the decorations here, you'll need:
- Cardstock
- Vintage music sheets or paper of choice
- Fabric(s)
- Buttons and beads
- Needle and thread
- Scissors
- Pen
- Pins
- Twine
- Glue stick
- Washi tape
- Gift bags and tags
- Sewing machine
- Small twigs or wooden skewers
Vintage Music Sheet Ornament
Materials:
Materials:
- Vintage music sheets or other paper
- Cardstock
- Scissors
- Pen
- Buttons and beads
- Needle and thread
- Glue stick
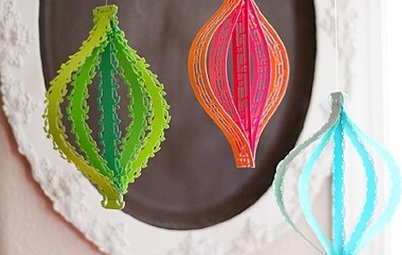
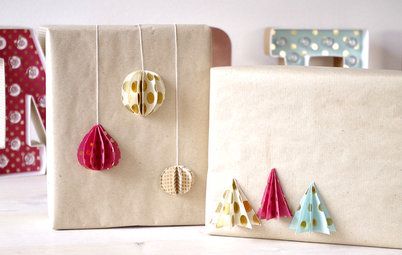
2. You will need six paper circles for each decoration. Fold each circle in half. Glue half of a circle and stick it to the half of another circle, lining each half up against each other along the middle fold. Continue with all six circles to form the shape.
3. Use a needle and thread to gently sew diagonal stitches over the top, as shown in the previous image.
4. Leaving enough thread to form a loop for hanging your ornament, thread a bead through and secure it with a small knot.
4. Leaving enough thread to form a loop for hanging your ornament, thread a bead through and secure it with a small knot.
Continuing on the theme, I also made a paper chain out of vintage music sheets to string around the tree. I tied little soft gold bows as an accent.
Star Ornament
Materials:
Materials:
- Sewing machine
- Scissors
- Pen
- Vintage music sheets or other paper
- Fabric(s)
- Buttons and beads
- Needle and thread
2. Create fabric versions of your star using the larger star template. You will need two fabric stars for each ornament.
3. Lay out each paper star onto a fabric star, right sides facing up, and pin into place. Don't worry if your paper and fabric stars don’t exactly match up; we will correct this later on.
4. Slowly sew 2 millimeters all the way around your paper star. Use the balance wheel of your sewing machine to manually maneuver around the corners. It’s very easy once you get the hang of it.
5. Sew the buttons onto one star.
Once that’s done, place both stars wrong sides together. Don't forget to place a length of twine in between them to hang your decoration up. Pin the pieces together.
Once that’s done, place both stars wrong sides together. Don't forget to place a length of twine in between them to hang your decoration up. Pin the pieces together.
6. Slowly sew 2 millimeters all the way around your star, this time on the fabric, attaching the twine at the same time. Trim about 2 millimeters from the stitch line so the edges are neat and tidy.
This is the end result. You can create these out of any fabric or paper combination you like. I went for neutrals with hints of gold for a romantic, rustic look.
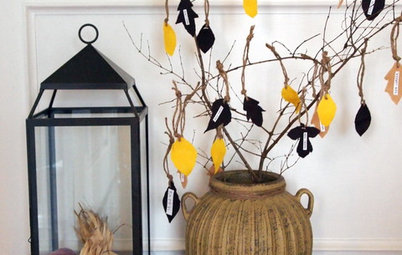
Building on the star theme, I added a handful of stars made from wooden skewers snapped in half, bound together at the joints with very thin washi tape. The star at the top of tree was made in the same way, without halving the skewers.
You can also make these out of gathered twigs. That was my original plan, but the weather over here in the Netherlands didn't allow for it. The skewers provide the same look and offer a contemporary alternative.
You can also make these out of gathered twigs. That was my original plan, but the weather over here in the Netherlands didn't allow for it. The skewers provide the same look and offer a contemporary alternative.
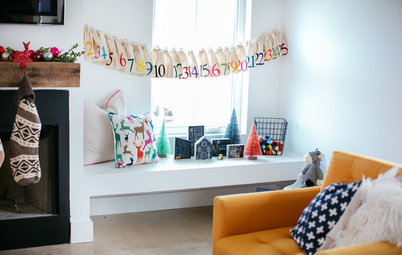
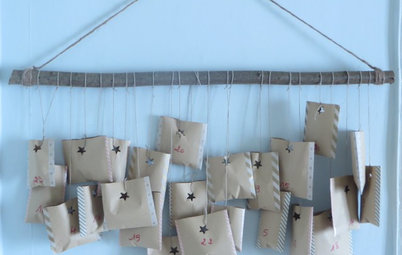
Personalize your Christmas tree by making a few little gift bags for each member of the family, like the one here. This couldn't be an easier DIY if it tried.
Decorated Mini Gift Bags
Materials:
2. Leave a bit of excess washi tape over the edge of the bag so that you can neatly trim all the way down the side to avoid folding the excess washi tape over the side of the bag.
Materials:
- Washi tape
- Gift bags and tags
- Scissors
2. Leave a bit of excess washi tape over the edge of the bag so that you can neatly trim all the way down the side to avoid folding the excess washi tape over the side of the bag.
3. Attach a personalized gift tag to one handle of the gift bag with a piece of twine, tie the twine in a bow and secure both with a tiny clothespin. Your gift bag is now ready to be filled with a special trinket and displayed on the tree.
From here in the Netherlands to wherever you are in the world, I would like to wish you a very Merry Christmas. May it be spent with those you love and have warmth and joy — and, of course, a pretty Christmas tree!
Tell us: Is your tree decorated with hand-crafted ornaments? Share a photo below!
Next: More holiday decorating ideas
Tell us: Is your tree decorated with hand-crafted ornaments? Share a photo below!
Next: More holiday decorating ideas


Sponsorizzato
Ricarica la pagina per non vedere più questo specifico annuncio

Sponsorizzato
Ricarica la pagina per non vedere più questo specifico annuncio
Apart from the gold glass ornaments, each item on the tree, from the fabric and paper stars to the personalized gift bags, has been crafted by hand. A paper chain made from vintage music sheets, stars made from sticks and dainty little bows add a touch of romance.